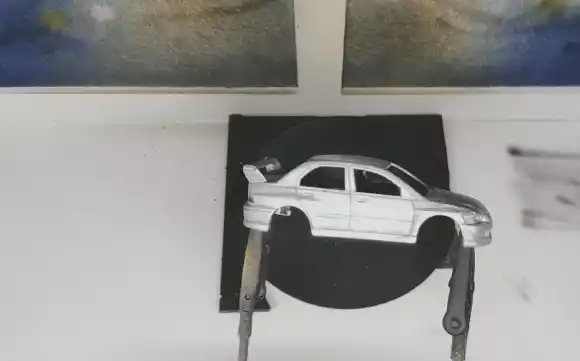
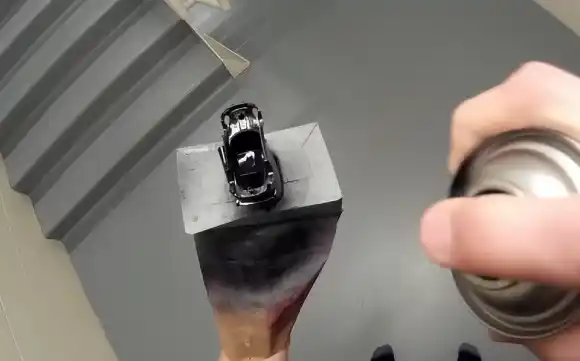
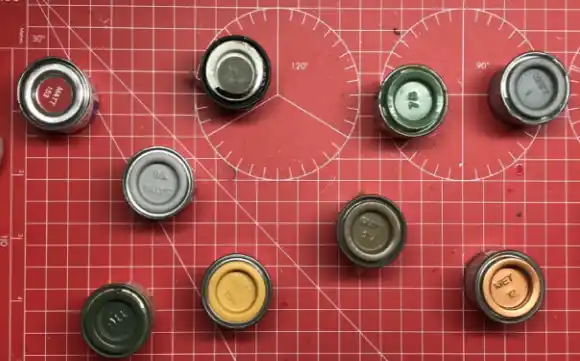
Customizing hot wheels with suitable colors can be a huge craze for miniature toy car enthusiasts. Indeed, the paint on Hot Wheels can make all the difference in bringing their design to life and giving them a soothing look to the collectors. However, it all depends on your hot wheels painting proficiency.
Do you know how these tiny cars are painted with such precision? To paint a HotWheels car, first clean and sand the surface. Then apply a thin coat of primer, and mask the areas you do not want to paint. Next, apply thin, even coats of paint until you achieve the desired color. Finish with a clear coat for added protection and a glossy finish.
If you want to improve your Hot Wheels painting skills, you are here at the right place. I will help you achieve a smoother painting experience by describing the steps in detail. So let's dive right in.
Why paint hot wheels?

There can be many reasons why people want to paint their Hot Wheels toy cars. Here are some of the main reasons.
1. Customization
Many collectors and enthusiasts customize their Hot Wheels cars to make them unique and personalized. Painting is a popular way to achieve this, allowing endless color and design possibilities. Customized Hot Wheels can be used for display, play or racing competitions.
2. Restoration
Some collectors prefer to restore vintage or damaged Hot Wheels cars to their original condition. Painting is often necessary to replace chipped, faded or missing paint. Restoring a Hot Wheels car to its original condition can increase its value and collectability.
3. Creativity
Painting Hot Wheels cars can be a fun and creative hobby that allows people to express themselves artistically. Some collectors enjoy experimenting with different techniques and color combinations to create unique designs. Painting Hot Wheels can also be a fun activity to do with children or as a group.
4. Learning
Painting Hot Wheels can also be a way to learn new skills and techniques. It needs patience, precision, and attention to detail, all of which can be valuable skills for other areas of life. Painting can also teach people about color theory, blending, shading, and other artistic concepts.
How to Paint Hot Wheels [Step-by-Step Guide]
Painting hot wheels is not a tough job, but it is not a piece of cake. You need to follow proper instructions to finish the job smoothly. Here is a step-by-step guide to help you.
Materials You Need:
- Hot Wheels car
- Sandpaper (1200-grit)
- Primer spray paint
- Paint spray paint (your desired color)
- Clear coat spray paint
- Masking tape
- Newspaper or cardboard (to protect your workspace)
Here I will describe the entire procedure in two methods.
- Method- Steps to follow before painting
- Method- Steps to follow after painting
Now, it's time to go for the detailed discussion. Let’s take a look at.
Method 1: Steps You Need to Follow Before Painting
1. Clean the Hot Wheels car
Before you start painting your Hot Wheels, it is crucial to clean it thoroughly to ensure a smooth and even paint job. Wash the car with soap and water to remove dirt, grime, or dust. Ensure you rinse the hot wheels car thoroughly and let it dry completely before proceeding to the next step.
2. Sand the Hot Wheels
Sanding these miniature toy cars is a critical step that prepares the surface for painting. Using sandpaper, gently sand the entire surface of the hot wheels. Remove any rough spots, imperfections, or blemishes on the surface.
It will also help the primer and paint adhere better to the surface. Ultimately you will get a smooth and even finish.
Also, ensure to use fine-grit sandpaper and lightly sand. So you don't damage the hot wheels car's surface or remove too much material.
3. Prime the hot wheels
After cleaning and sanding the Hot wheels, apply a coat of primer. Spray a thin and even coat of primer on the surface. Ensure you cover the entire surface. The primer will assist the paint in adhering better to the body. It also provides additional protection to your hot wheel car's original paint. Once done, let the primer dry.
4. Mask the hot wheels
Before applying the paint, you must mask any areas of the diecast car you want to avoid painting. Use masking tape to cover the windows, tires, or other areas you want to protect.
Press the tape firmly in place and ensure it covers the entire area you want to protect. It will ensure that the paint only goes where you want it to and prevents any overspray.
Method 2: Steps to follow when the hot wheels cars are ready to paint

1. Apply Paint to your hot wheels
- To paint your Hot Wheels car, first spray a thin and even coat of paint on the car. Ensure to cover all the areas you want to paint.
- It is essential to spray the paint evenly to achieve a smooth finish.
- Allow the paint to dry completely before adding another coat.
- Repeat this step until you achieve the desired color and coverage.
Things to Remember: Be patient and wait for each coat to dry before adding another.
2. Apply Clear Coat
Once the paint has dried completely, spray a thin and even coat of clear coat on the hot wheel car. A clear coat is essential for protecting the paint and giving it a glossy finish. Apply the clear coat in a well-ventilated area, and let it dry completely.
Note: A clear coat is available in various finishes, such as matte, satin, or glossy. So choose the one that you prefer.
3. Remove Masking Tape
Once the clear coat has dried, it is time to remove it carefully. Gently peel off the tape to avoid damaging the paint.
You can use a hobby knife to cut paint buildup along the edges. Now you have a beautiful custom-painted Hot Wheels car ready to show off. Make sure to keep it in a safe place to avoid any scratches or damages.
Caution! Always work in a well-ventilated area and wear a mask to protect yourself from the fumes. It is also essential to read and follow the instructions on the spray paint cans carefully.
Can you spray paint your Hot Wheels?
Yes, you can spray paint your Hot Wheels, but it is not recommended. Spray painting can cause the paint to chip or crack easily. It may also not adhere well to the plastic surface of the car.
Additionally, the chemicals in spray paint can be harmful if not used in a well-ventilated area or inhaled. It is better to use acrylic or enamel paint made explicitly for plastic models to achieve a more durable and long-lasting finish.
How to paint headlights on hot wheels?
To paint the headlights on Hot Wheels, you will need a few supplies, such as acrylic paint, a toothpick, and a small paintbrush. Here are the steps to follow.
- Clean the Hot Wheels car headlights with a damp cloth to remove dirt or debris. Allow it to dry completely before proceeding.
- Squeeze a small amount of acrylic paint onto a palette or flat surface. Mix the paint well with a paintbrush to ensure a smooth consistency.
- Using a small paintbrush, carefully apply a thin coat of paint over the car headlights. You may need to apply several coats, allowing each layer to dry before adding another.
- After each coat, use a toothpick to remove any excess paint from the edges of the headlight.
- Once the paint has completely dried, add a different color over the headlight bulb with a toothpick.
- Allow the paint to dry completely for a few hours. Then, you can add any additional details or layers of paint as desired.
How to remove hot wheels paint?
Remove the existing paint if you want to repaint your Hot Wheels car. It can be done using a paint thinner or paint stripper. But be careful as these products can be hazardous. Here are the steps to remove Hot Wheels paint.
1. Prepare the Materials
You will need a clean strip of paint thinner, a cup, and gloves. Pour some paint thinner into the cup.
2. Soak the Car in Paint Thinner
Next, place the Hot Wheels car in the cup and ensure it is fully dipped. Wait for around 30 minutes and check if the paint is coming off.
3. Assess the Results.
After 30 minutes, check the car to see if the paint has started to come off. If it is insufficient, you may need to use a stronger product.
4. Use Paint Stripper
Purchase a paint stripper from a hardware store. Follow the instructions on the product carefully. Usually, you need to apply the stripper, wait a few minutes, and then wipe the paint off with a cloth. You may need to repeat this process to remove the paint properly.
5. Sanding
After using the paint stripper, you may need sandpaper to remove any remaining paint. Use sandpaper carefully, and ensure not to damage any of the details on the car.
6. Clean Up
After removing the paint, properly dispose of the paint thinner and any clothes used. Ensure that the area is well-ventilated and wear gloves.
What should be included in the hot wheels painting set?
A basic Hot Wheels painting set should include the following:
- Hot Wheels car
- Paintbrushes in different sizes
- Paints in various colors
- Stencils or templates for designs
- Painter's tape to mask off areas
- Protective gloves
- A workspace cover or mat
- A cleaning cloth or paper towels
- Instructions or a guidebook with painting tips and ideas.
What kind of paint is used on Hot Wheels?

Enamel paint is the perfect match for painting Hot Wheels. It is such a type of paint that dries to a hard and ensuring a glossy finish. One important note is that Enamel paints work better on metal and plastic surfaces. They are durable and can withstand exposure to heat, moisture and other elements. The paint is typically applied using an airbrush or spray gun.
Can you paint hot wheels with Acrylic paint?
Yes, you can paint Hot Wheels with acrylic paint. Acrylic paint is water-based, dries quickly and adheres well to plastic surfaces. To ensure good adhesion and durability, you should clean the surface and sand it lightly. It is also good to use a primer before painting with acrylic paint.
Can you paint Hot Wheels with nail polish?
Yes, you can paint Hot Wheels with nail polish, but better options may exist. Nail polish may not adhere well to the car's surface and may chip or peel easily. It may also not provide a smooth or even finish. Using paint designed explicitly for model cars would be better for a more durable and professional-looking result.
Should I paint my Hot Wheels cars headlights and taillights?
Yes, painting the headlights and taillights on your Hot Wheels cars can make them look more realistic and detailed. However, it may take work to achieve a professional-looking finish. It could also decrease the value of the cars if done poorly. Ultimately, it is up to personal preference and skill level.
Can you customize Hot Wheels by painting it?
Yes, you can customize Hot Wheels by painting them. It is a good way to personalize your collection and create unique designs. However, using proper materials and techniques is essential to ensure the paint adheres well and ensures the toy's safety. Using harmful chemicals or spray paint is not good. It can be dangerous and damage the plastic.
Conclusion
Hot Wheels cars have always been a favorite toy among car enthusiasts and their paint jobs play a significant role in their appeal. Painting Hot Wheels cars can be a fun and rewarding experience if you use the right materials and techniques. It is a simple job but needs patience for a smooth finish. Pay attention to the instructions while painting; otherwise, you may damage your hot wheels.
