For many years, Radio Flyer tricycles have been regarded as among the best rides for kids. Due to changes in a child's growth, it becomes necessary to adjust the tricycle to ensure that it is safe to ride. This is where the question arises, "How to adjust a Radio Flyer tricycle?"
You should adjust the seat height, handlebar alignment, and pedal position to ensure a comfortable riding experience for your baby. First, assemble the tricycle and ask your kid to give it a try. Then ask what changes they want and make the necessary adjustments.
Today, I will be discussing how to assemble the Radio Flyer tricycle and then adjust the different parts. Sit tight and continue scrolling to find out everything about adjusting the Radio Flyer tricycle.
Things You Need
You will need the following items/materials/tools for the whole process:
- Radio Flyer tricycle
- Scissors/Blade
- Wrenches
- Screwdrivers
- Pliers
- Allen wrenches
- Hammer
- Grease
How to Adjust Radio Flyer Tricycle: Unboxing and Pre-Assembly Steps
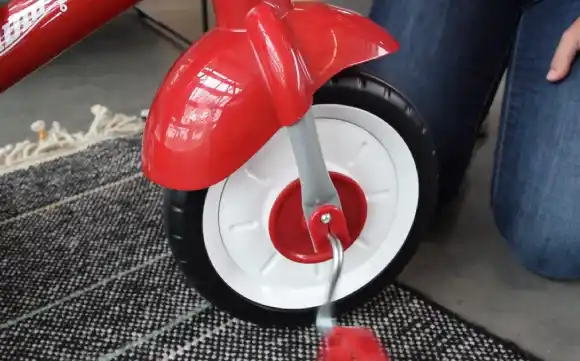
Adjusting a Radio Flyer tricycle is a simple process that can make a big difference in a child's riding experience. Here is the step-by-step guide on unboxing and pre-assembly tips for adjusting the Radio Flyer tricycle:
Step 1: Unbox
First, find a spacious place and get the Radio Flyer tricycle box. Then take a blade or scissors and cut the plastic tape to unbox the Radio Flyer tricycle. Then take out all the items carefully, one by one.
Step 2: Check the items
After taking out all the items, check if everything is there. In general, you will find the following items in a Radio Flyer tricycle box:
- Frame
- Wheels (front and back)
- Seat
- Handlebars
- Pedals
- Hardware (nuts, bolts, screws, etc.)
- Instruction manual
Depending on the model, there might be some extra items. Check the manual to see if everything is there. If you find any part is missing, contact Radio Flyer immediately for a replacement.
Step 3: Gather Assembly Tools
Once you have ensured all the tricycle parts are there, gather the following tools and materials for assembling the Radio Flyer tricycle:
- Wrenches
- Screwdrivers (flathead and Phillips)
- Pliers
- Allen wrenches
- Hammer
- Grease (to lubricate moving parts)
However, most Radio Flyer tricycles will come with an Allen wrench. In that case, you will not need to get an extra Allen wrench.
How to Adjust Radio Flyer Tricycle: Assembly Steps
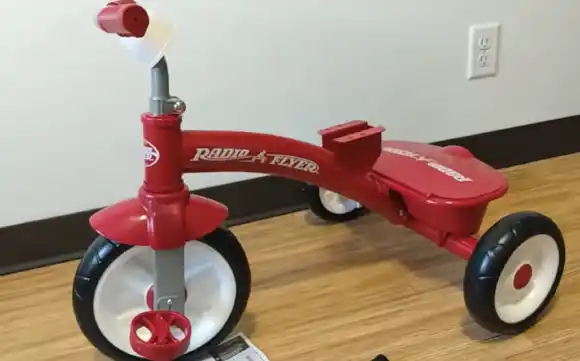
When I saw the instructions to assemble the Radio Flyer tricycle, I was at a loss. It is full of pictures without much-written instruction. If you are facing a similar issue, this guide will help you.
After you are ready with the parts and tools, follow the steps below to adjust the Radio Flyer tricycle:
Step 1: Attach the Rear Wheels
First, start with installing the rear wheels. Most Radio Flyer tricycles have two rear wheels that you need to attach. If there are any caps on the end of the rear axle, remove them and attach the wheels to the frame.
Then use a wrench and screwdriver to fasten the wheels. Do not tighten any nuts and screws, or else it will damage them. After attaching the rear wheels, move on to the front wheels.
Step 2: Attach the Front Wheel
In this step, you'll need to align the front fork with the front wheel axle. Then insert the axle through the fork and wheel. Once the axle is in place, you can tighten the nuts using a wrench and pliers to secure the wheel in place.
Some of the Radio Flyer's front wheels come with pedals attached to them. You won't need to install them separately if yours has the same feature; however, if not, you can do that later.
Step 3: Install the Handlebars
Now, take the handlebar and insert it into the stem. Then align the stem with the fork. Make sure it's straight; otherwise, your child may have trouble navigating.
While installing the handlebar, ensure that the bottom of the clamp is flush with the bottom of the stem. Use the Allen wrench to secure the handlebar in place.
Step 4: Install the Seat
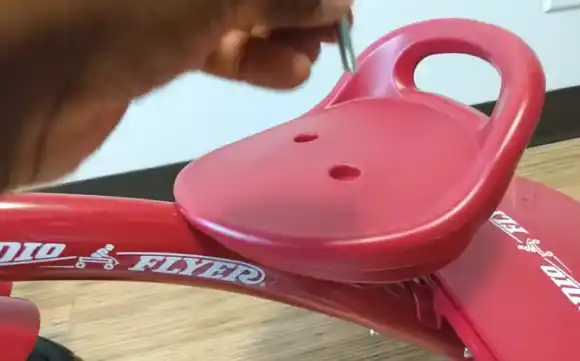
Now, you can move on to installing the seat. Mount the seat post on the seat tube and adjust its position as per your requirements. Then insert the nuts and tighten them with the wrench and the screwdriver.
Step 5: Install the Pedals
Install the pedal's wheels right away if they aren't already there. Identify the right and left pedals and insert them into the correct crank arms. Then again, secure them with a wrench. With this, the primary assembly of the Radio Flyer tricycle is over.
Step 6: Check All Connections
Lastly, check all the connections, nuts, and bolts to ensure they are secured. If you do not check them, it will be unsafe for your baby to ride the tricycle. Besides, apply grease to the pedal and handlebar, and other moving parts for a smooth operation.
Once you are done with the checking, you can put your baby on it and let them play.
How to Adjust Radio Flyer Tricycle: Adjustments and Final Checks
After riding the tricycle, your baby may find it uncomfortable because of the wrong alignment. In order to ensure a comfortable ride, observe and ask them what modifications you should make.
Here are a few adjustments you may need to make to the Radio Flyer tricycle:
Seat height
Adjust the seat's height and position to ensure that the baby's feet can touch the ground. Additionally, it will assist them in maintaining proper leg extension while pedaling. Use a screwdriver and a wrench to uninstall it and then reinstall it in the correct position.
Handlebar Height
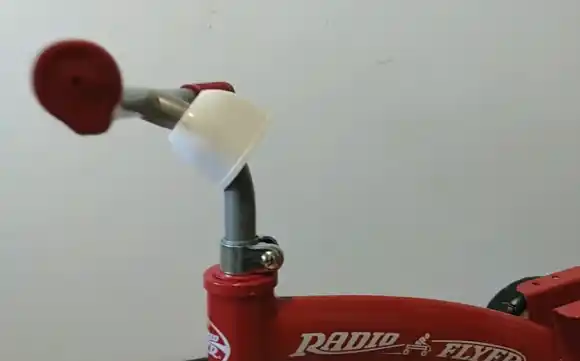
Adjust the handlebar's height to ensure that the baby can comfortably grip the handlebars. Besides, ensure it is aligned properly so that the rider has no problem steering or navigating. Use the Allen wrench to loosen the connection and fasten it after making adjustments.
Pedal Position
Lastly, adjust the pedals' position to ensure that the baby’s feet can comfortably reach and push them. Loosen the pedal with the Allen wrench and then reinstall it in the correct position.
Once you are done with the adjustment, you can let your kids have fun with their Radio Flyer tricycles.
Note: This is a general Radio Flyer tricycle adjustment guideline. Click here to get instructions for specific models.
How Long does It Take to Assemble a Radio Flyer Tricycle?
It takes around 30 minutes to an hour to assemble a Radio Flyer tricycle. The time can be shorter or longer, depending on the model and your experience with assembling tricycles.
Can I Assemble a Radio Flyer Tricycle Alone?
Yes. Assembling a Radio Flyer tricycle is quite easy, and you can do it alone. However, it will be helpful and take less time if someone assists you.
How Often Should I Check and Adjust the Tricycle After Assembly?
You should check and adjust the tricycle after assembly when the baby tries it, and ask for any adjustments. Then, when your child grows and needs an adjustment once more, you can repeat the process.
What Should I do If I Encounter Difficulties During Assembly?
If you face difficulties while assembling the Radio Flyer tricycle, you should contact the support staff at Radio Flyer. You will find the number in the manual.
Conclusion
Now you know how to adjust the Radio Flyer Tricycle. Follow the instruction manual and this article to ensure you do everything perfectly. If you have any confusion, you can call the Radio Flyer customer center for assistance.
