If you have purchased the Hot Wheels Car maker, you must be wondering how to make hot wheels car? Although the manufacturer provided instructions in the manual, it is not well explained. Then, how to make a hot wheels car at home?
To make a Hot Wheels car, first, turn on the machine and insert the wax sticks, followed by the mold. The machine will go through the heating and cooling phase. Then set the car on the chassis and customize it with the stickers. You also can follow other DIY methods.
That was pretty easy to do. Besides using the Hot Wheels Car maker, you can use cardboard or paper. For detailed step-by-step instructions about making Hot Wheels Cars, stay tuned with me till the end.
DIY Guidelines to Make Hot Wheels Car:
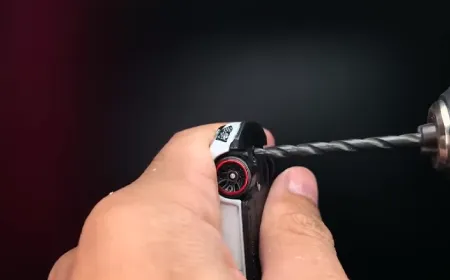
You can follow different methods to make a Hot Wheels Car. Today, I will be discussing about the following methods:
- Making Hot Wheels Car with Hot Wheels Car Maker
- Make Hot Wheels Car with cardboard
- Make Hot Wheels Car with paper
Below, I will be discussing each of these methods with detailed step-by-step guide:
Method 1: Making Hot Wheels Car with Hot Wheels Car Maker set
The Hot Wheels Car Maker Playset is probably one of the best products from the company. It comes with wax sticks to make new Hot Wheels cars of your choice.
You can choose from different colors of sticks and designs. Then set it to your favorite chassis and decorate it with different stickers.
Hot Wheels is one of the best diecast car brands. The company sells diecast toy cars in various designs. You can check our latest diecast car scale chart here. However, you may have your own imagination or dream car design.
Hot Wheels make your dream come true with this amazing car maker set. The quality is quite good, and I think it is totally worth the price.
One of the best features of the Hot Wheels Carmaker is that it provides voice instructions to help you make cars.
Besides, it makes amazing factory sounds to give you a realistic feeling. The beeping light on the front is extra fun for kids.
How to Make Hot Wheels Car: Step-By-Step Guide
Before starting, ensure you have all the things ready to make a hot wheels car.
Things You Need:
- A place near an electric socket
- Carmaker machine
- Wax sticks
- Mold
- Removal tool
- Chassis
- Sticker sheet
Once you have all the things ready, start following the steps below:
Step 1: Plug in the Carmaker
The Hot Wheels Car Maker does not need batteries. Instead, it requires electricity to operate. You will find the cord in the package. Get it out, and insert it into the bottom of the car-making machine.
Then plug in the cord, and the machine will start. The best thing about the machine is that it gives you voice instructions. When you turn on the machine, it will automatically say "Hot Wheels Car Maker."
Step 2: Insert the Mold & the Wax Stick
After turning on the machine, the door at the bottom front will automatically open. Then the machine will instruct you to insert the wax stick. It requires two sticks to be inserted on first use. One will be inside, and the other will have half the part outside the machine.
Then the machine will instruct you to insert the mold. You have two molds in the package. Use the one that you prefer.
Note: In the first use, there is already a blue wax stick inside the machine. That's why you will not get the color of the car matching the stick you entered last.
Step 3: Heating Cycle
After inserting the mold, close the door, and the machine will start the heating cycle. The manufacturer says the cycle will be around 8 minutes, but in real-life usage, I have seen it take around 8 minutes and 30 seconds. It's not a big deal, though.
Note: While the heating cycle is going on, the machine makes musical noises. Plus, it will say "heating" once every few minutes to let you know that it is going through a heating phase.
Once the heating cycle is completed, the machine will again say that the heating is completed.
Step 4: Cooling Cycle
After completing the heating cycle, the carmaker will instruct you to hold down the handle. Do it, and it will begin the cooling cycle. Again, the machine will frequently say cooling to let you know about the process.
Note: During the process, the handle will automatically get up. It's a part of the process, and there's nothing to worry about.
While the cooling process is going on, you will be able to see the wax going down inside the machine. Once the process is done, it will say, "Cooling complete. Car ready." The cooling process also takes little more than 8 minutes and 30 seconds.
Step 5: Get Out and Remove Excess Wax
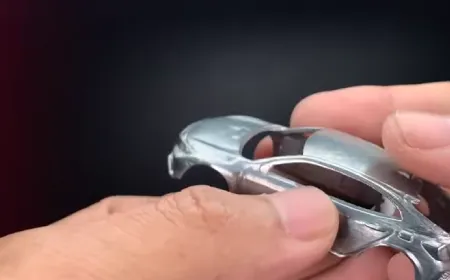
After completing the cooling process, the front door will automatically open up. The machine will then instruct you to remove the mold. There is a spot inside the door; press it and then pull out the mold from the machine.
Now, you may find some excess wax sticking to the mold. Use the small removal tool that comes with the package to remove excess wax from the mold body.
Step 6: Remove & Set on a Chassis
After removing the excess wax, set apart the mold. Inside the mold, now you will be able to see the beautiful looking hot wheels car part. Then, use the removal tool to pry up the car.
Tip: There are some little holes beneath the mold. Use the tool to push through the hole so you can easily pry up.
After removing the car, put it on one of three chassis of your choice. Now you are almost done.
Step 7: Customize With Stickers
Although the car is ready to play, I'll use some stickers to customize the look. The Hot Wheels Car Maker comes with three sets of stickers, and all of them are awesome.
For my car, I have used two fire stickers on the door and a 99 sticker on the front hood. You can use stickers of your preference to make it look cool and stylish.
Method 2: Make Hot Wheels Car with Cardboard
You always don't need a machine to make a Hot Wheels Car. You can make your own toy car at home with the cardboard that you will probably find in your store room. It will look nothing less than the original ones. First, let's take look at the materials you will need.
Things You Need:
- Cardboard
- Steel scale
- Pen
- Scissors
- Knife
- Glue
- Paint
- Bottle caps
- Straw
Most of the items should be available at home. Once you have gathered everything, follow the steps below.
Step 1: Draw Lines on the Cardboard Box
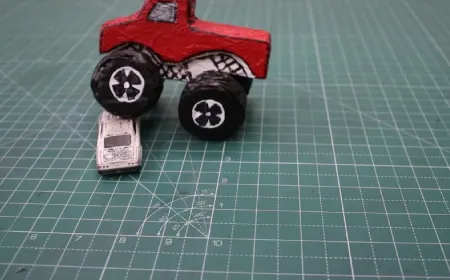
First of all, you will need to prepare different parts for making a Hot Wheels Car. For that, you need to cut the cardboard into pieces with a specific design. Follow the design shown above in the photo and use a pen and scale to draw.
Step 2: Cut the Cardboard
After drawing the design, cut the cardboard with a knife or scissors. You'll have 5 pieces like the picture above.
Tip: Use a box cutter knife and the scale to cut the pieces perfectly. The Slice - 10400 Box Cutter can be a great choice at budget for this purpose.
Step 3: Attach the Pieces
Now, attach all the pieces together to build the structure of the Hot Wheels Car. You can see the photo above to get an idea of how the pieces should be attached.
Use a good cardboard glue such as the Scotch Quick-Drying Tacky Glue for a stronger bond. It comes at a pretty affordable price too.
After building the structure for the car's upper body, now place it on the large card that is the base for the structure.
Step 4: Prepare Lights
With a simple design, a car will never look like Hot Wheels. That's why I will add some style to it. Here, I'm using some straws that came with juice packets. I'm also using them to make the light. You can follow my style if you have straw at home or you can try to add your own creativity to the design.
Step 5: Make Tires
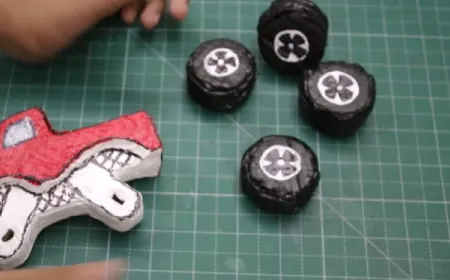
Now, let's make the tires with cardboard. Make ten circular pieces from the cardboard with the same size. Then draw a smaller circle inside and use the knife to separate them.
Caution: Don't damage the outer circle. Be careful when you are separating the outer circle from the inner one.
After separation, take one full size circle cardboard, and stick five pieces of outer circle on it. For the exposed part, you can make holes in a bottle cap and attach it to it.
Step 6: Set Tires
Again I'm using the straw to connect the tires together. You also can use any thin stick. After preparing the tire, place it above the base of the car earlier you attached with the car structure.
Step 7: Finishing
Now finally the customization part comes. It helps to give the car an authentic Hot Wheels look. I painted the whole body with ash color and then made a fire sticker with yellow and red paper. After sticking it, the car looks like original Hot Wheels Car!
Method 3: Make Hot Wheels Car with Paper
You also can make Hot Wheels Car with paper at home. But you will need some thick papers that can stay strong and stand. Let's have a look at things you will need to make a HotWheels Car with paper.
Things you need:
- Thick paper
- Scissors
- Plastic stick
- Small tires
- Glue gone
- Colorful paper
- Scotch tape
Once you have all the items ready at one place, start making Hot Wheels Car following the steps below:
Step 1: Prepare the Base
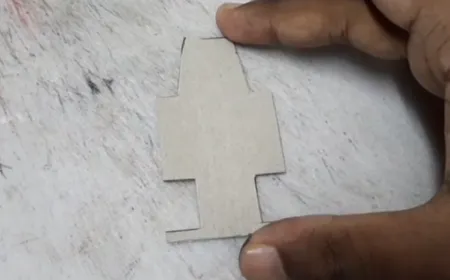
First, prepare the base with the thick paper and the tires. Cut the paper with the scissor following the shape shown in the picture. Then attach the tires on it with scotch tape.
Recommendation: Not all scotch tape is able to hold the tires with the base. If you don't have good quality tape at home, get the Scotch Transparent Tape. It has four rolls and the price is pretty low.
For making the tire, use any tires from any small car you had at home. Use the stick that comes with the lollipop to connect the tires together.
Step 2: Attach the Doors
Now, cut two pieces of doors for two sides. Both pieces will have the same measurements. You can see the shape in the photo. Use a glue gun to attach them.
Step 3: Set the Front Divider
After setting the doors, place a divider in the middle. It will be almost a square shaped paper. Again use the glue gun for sticking.
Step 4: Place the Top
Then add a bending piece of paper behind the car and cover the top side with another piece of paper. It will complete the main structure of the car.
Step 5: Add Front
Now, add a hood in the front side of the car. You can see in the photo how I made a hood with a piece of thick paper. Use the same style or you can try something different.
Step 6: Coloring with Color Paper
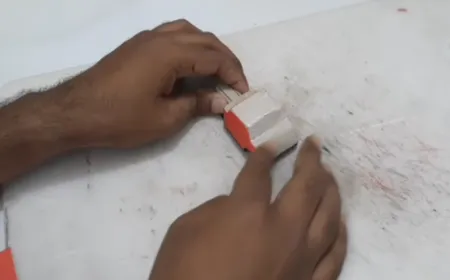
After attaching the hood, role the main body with a color paper. Use scotch tape or glue to make it stick with the body. Cut out any excess parts with a scissor.
Step 7: Finishing
Then you can paint the body if you want. I added some sticks with the hood to make it look more stylish. A headlight will make it more authentic. This is how you make Hot Wheels Car at home.
Hot Wheels Car Maker Protoshotz Wax Sticks Refill Pack
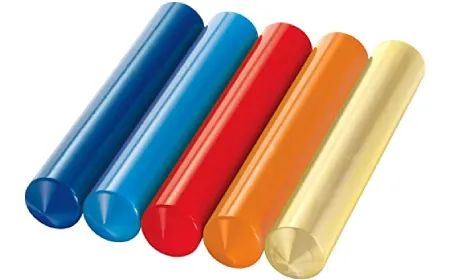
The Hot Wheels Car Maker comes with only 10 wax sticks. But what to do when you have used all the sticks? Not to worry, as you can purchase the Hot Wheels Car Maker Protoshotz Wax Sticks Refill Pack.
The refill pack comes with 5 pieces of protoshotz wax sticks. It's not a third-party product, so you do not have to worry about the quality. They are original sticks and also come at an affordable price.
Tip: I recommend you purchase a few sets of wax sticks at a time. It will not require you to get a new set every few days.
Conclusion
I hope you have understood the process of how to make hot wheels car. Now you can show your creativity by combining different colors and stickers to make different styles. I prefer to buy a couple of extra refill packs when purchasing the carmaker set. But if you have already bought the set, you can go for the sticks anytime you want.
