A broken or damaged gearbox can make your power wheel riding too dangerous. Sometimes it is tough for a loyal power wheel owner to think there might be something inaccurate with their existing gearbox. Power wheels gearbox repair helps your child to enjoy a safe and reliable riding experience. But the question is, how do I fix the Power wheel's gearbox properly?
Fixing the power wheel gearbox is a step-by-step solution. If it needs repair, the following steps can be a great help.
- Remove the bottom Cover and Motor
- Separate the gearbox parts
- Repair the parts
- Reinstall the gearbox and make a test drive
Different things can go wrong with the power wheels' gearbox. If the gearbox is damaged badly, you must replace it to ensure better performance. In the following discussion, I will try to reveal A to Z regarding power wheel gearbox troubleshoot.
How To Identify Your Power Wheel Gearbox? 3 Ways for Identification
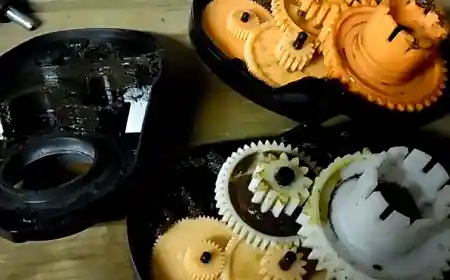
Gearboxes are not the same; they are available in several types. But how can you know what kind of power wheel gearbox you have? You have three simple ways to identify the power wheel gearbox.
- Check the User Manual
It is straightforward; check the owner's manual, and you can easily know about your power wheel gearbox. The user manual describes everything about the gearbox.
- Printed Label inside driver's door
If you do not have a manual, no worry, you can also identify it. Check for the printed label inside the driver’s door; you will find all information about the gearbox.
- Identify the pitch
You can also identify the gearbox by knowing the pitch of the gearbox. Check for the line in the axle's middle; it will describe the gearbox pitch and type.
Why does Power Wheels Gearbox Need Repairing Service?
The significant sign that your gearbox is damaged is the loud noise. Power wheels cars gearbox generates a grinding sound which indicates you have a problem with the gearbox.
External factors are the leading causes of gearbox failures. If you fix the gearbox problem without identifying the reason, you may face the problem again. To determine the cause of gearbox problems and fix them accordingly for a better solution.
Here I have listed the major gearbox problems; you will need repairing services.
- Melting of gearbox Casing behind the first gear drive
- Stripped Gear
- Broken gears teeth
Ways to Fix Power Wheels Gearbox
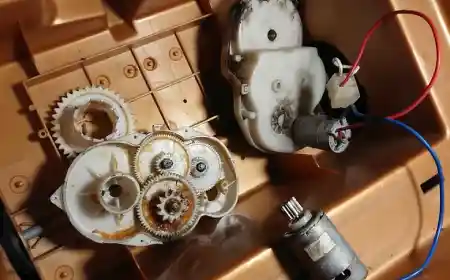
Let’s fix the faulty power wheels gearbox problem in the following ways.
a) Repairing Power Wheels Gearbox
b) Replacing Power Wheels Gearbox
Since Power Wheels cars are made of tiny metal and plastic parts that are connected together with screws and safety clips, it is easy to take them apart, repair, replace and reassemble them. But you must have suitable tools for fixing the Power Wheels gearbox.
Things You Will Need:
- Screwdriver
- Philips Screwdriver
- Power drill
- Safety gloves
- Replacement gearbox
Detailed Step-By-Step Solution Guide:
A) Repairing Power Wheels Gearbox (broken)
Repairing the Power Wheels gearbox is no doubt a complex job. But if you follow below easy steps, you can easily fix the problem without creating a mess.
How To Repair Broken Power Wheels Gearbox
Identifying a broken gearbox is very easy. Power Wheels gearbox looks like it has little teeth on here; even if you touch it, you tell the rather flimsy. If you see the gearbox is damaged, you can easily identify it by seeing or touching it.
Step 1- Remove the bottom Cover
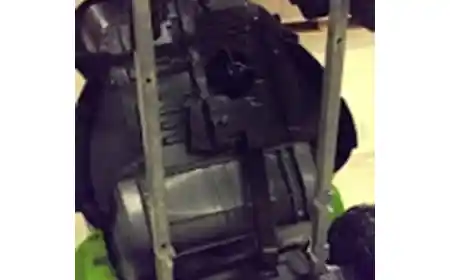
The gearbox is included in the lower body of the power wheels. You can access them by removing the cover from the bottom. To remove the cover, turn your car faces down and removes the screws and nuts using a Philips head screwdriver.
Step 2- Remove the Motor
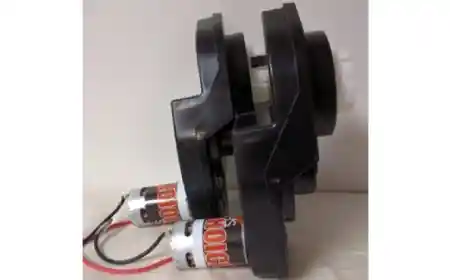
Please take out the gearbox and check for its parts to confirm the damage. You will need to remove the motor from the gearbox for detailed checking. It is pretty easy to remove the motor. Take a flathead screwdriver and remove the motor from the gearbox.
Step 3- Separate the Gearbox Parts
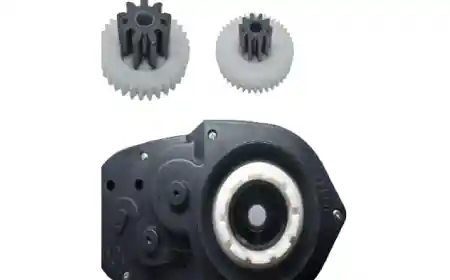
After removing the motor, you can separate the other parts of the gearbox, remove its gears one by one, and check the damage for each gear. Take a cloth, clean every gear, and apply the grease for better lubrication. Sometimes your gearbox is not damaged; it only needs greasing.
Step 4- Repair The Parts
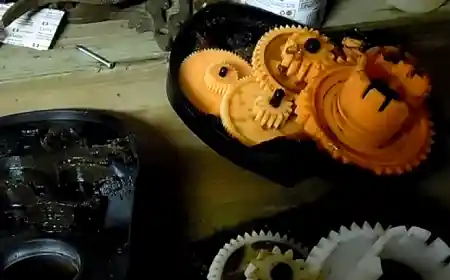
Check each gear, and repair the one that is damaged. You can use small pins in the holes to tighten the gears. If the holes are wider, you can also use nuts and bolts into the holes. Please do it for each gear, reinstall the gears, and ensure the gaps are correctly filled.
Step 5- Reinstall The Gearbox And Test
Reinstall the gearbox to the power wheels and apply the cover on the bottom. Turns the power wheels face up and then takes a test drive to confirm the elimination of the problem.
Remember, it is only a DIY and temporary solution; you should replace the gearbox or damaged parts with a permanent solution.
B) Replacing Power Wheels Gearbox
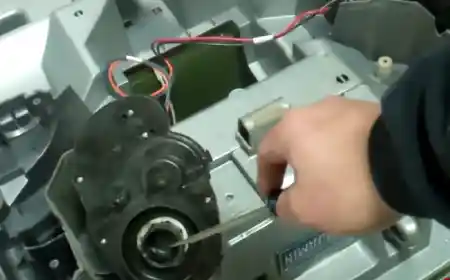
If your power wheels gearbox is severely damaged, replacing or upgrading the gearbox is an excellent solution. A bad gearbox limits the speed and performance of power wheels. So, to eliminate the problem, replace it with a new gearbox.
How to Replace Power Wheels Gearbox?
No special tool or equipment is needed to replace the power wheels' gearbox. You only need a power drill and a handy screwdriver.
Step 1- Remove The Protective Cover
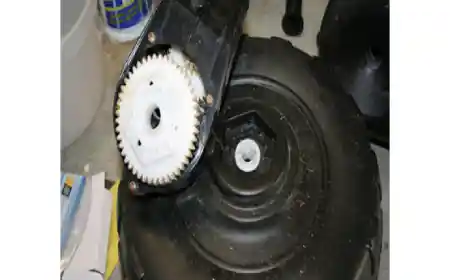
Turns the power wheels car face down on a flat surface and loosens the nuts and bolts to remove the protective cover. The protective gearbox cover may be in different power wheel models. But in most of the models, it is located near the wheel axle.
Step 2- Remove Wheel Axle Screws
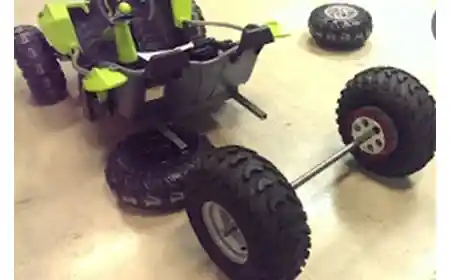
Unscrew the screws and pull the wheels off. Next, you will need to remove the hubcaps. Insert the flat-head screwdriver along the edges and pop off the tabs to remove the hubcaps.
You will be able to access the wheels' axle screws. Work with the screws and loosen them using a screwdriver and then off the cover using a power drill.
Step 3- Remove The Tires
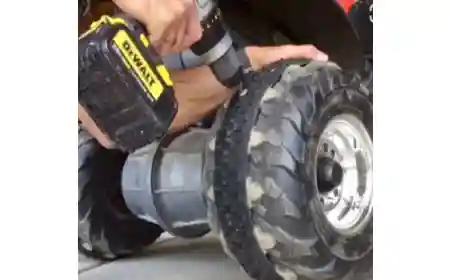
After removing the wheel axle screws, you can easily remove the tires. With a little pull, remove the tires. Repeat the process on the rear wheels and remove it off the power wheels.
Step 4- Lift The Cover
Now by using a power drill, remove the protective cover. You can also use a simple drill machine, but I recommend a power drill because it is fast and does the task more efficiently.
Remove all the screws and keep them aside in a safe place. Now access the cover and remove it. By simply pulling, you can remove the cover.
Step 5- Remove the Gearbox
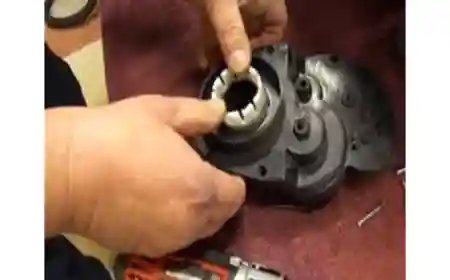
Here you will find the power wheels axle and a straight rod. Check it and ensure it should be straightforward; if there is a bent, you will need to replace it. Bent rods will make it challenging to shift the gears, and ultimately, gearbox performance also goes down.
After removing the cover and axle, the gearbox will expose. Gently pull the gearbox out from the box. The gearbox is not attached to the power wheels' body. It comes with a motor attached to it.
Step 6- Detach The Gearbox Motor
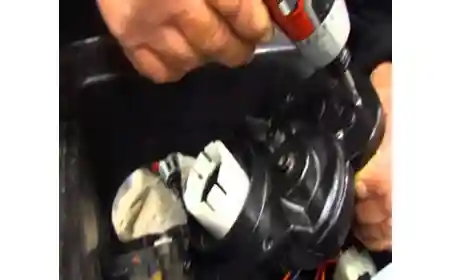
The motor also comes in an attachment with the gearbox. It is connected through a pair of wires and small screws. Remove the wires and screws and pull them to detach from the gearbox.
Step 7- Replace The Damaged Gearbox
Now that you have access to the gearbox, remove the screws and gently pull up the gearbox to take it out from the box.
Step 8- Insert new gearbox
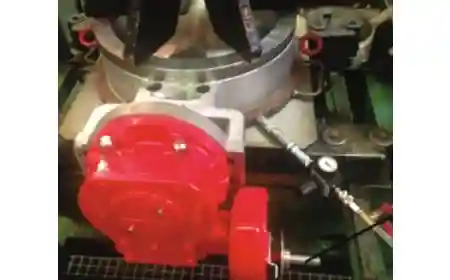
Please insert the new gearbox into the gearbox housing and pop it into the power wheel. Mount it using screws and ensure it fits and is tight. Repeat the same process for the next gearbox. It will make your job more perfect and fast.
Step 9- Reinstall The Gearbox Assembly
After inserting and mounting the gearbox, re-insert the rear axle and push it gently to fix it properly at its place. Repeat the process on both sides and ensure it perfectly fit on both sides of the power wheels.
Now fit the protective cover on the power wheel and screw it with screws. Ensure the cover is fitted correctly and there is no loose side.
Step 10- Test
Turn the power wheels face up and test them by the ride. Change gears, and drive it forth and back to ensure you have done everything correctly. If okay, enjoy the best ride. It is a permanent solution, and you can enjoy it for years.
A step-by-step guide to upgrading Power Wheel Gearbox
Upgrading the power wheels gearbox will help you to eliminate many of the common gearbox problems. You can replace the plastic stock with hardened steel first gear.
You will need the following things:
- 2 hardened steel first gears
- A screwdriver and
- A power drill
Step 1- Remove The Gearbox Protective Cover
Place your power wheels over a flat surface and work with the axle and tires to access the protective gearbox. Turn your power wheels face down, loosen the axle screws, gently pull the axle, and remove the tires.
After removing the tires, the protective gearbox will be visible to you. Unscrew all of its screws and then remove the gearbox protective layer.
Step 2- Remove The Motor
Now you can see the gearbox, but to work with the gearbox, you first need to remove the attached motor. Remove the motor screws and wires and detach them from the gearbox.
Step 3- Remove The Gearbox
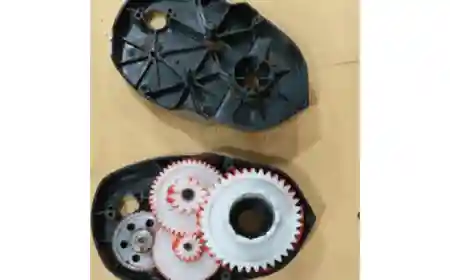
After axle and cover removal, you can access the gearbox. Gently remove the gearbox after removing the gearbox screws.
Step 4- Remove Gears
Open the gearbox casing; the casing is fitted with four screws; loose each of the screws with a screwdriver. After removing the casing, the gears will be visible to you.
Look at the gear assembly; they are stacked in a sequence and attached to the steel shaft. The fourth gear is the largest and sits on the top, followed by the third and second gear drives. The first gears with which we will work. It lies on the casing and is a smaller bunch than all above.
Wipe and clean the gearbox, and ensure no dust or grime is left. It will make it easy to operate and replace the first gears.
Step 5- Replace The Gears
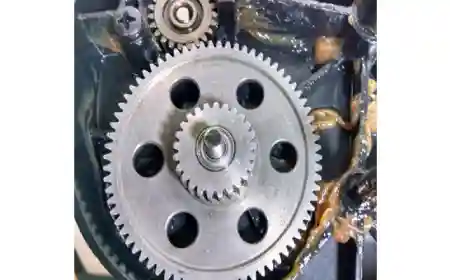
Replace the gears one by one; work with the first gears bunch. Replace its stock with hardened steel gear. Once you have replaced the first gear with the hardened steel, place the second, third, and fourth gears drive on the respective shafts.
While replacing the gears, also grease them for better lubrication. Good lubrication is essential for better performance of gears, and it is the best time to grease them. Gently apply the grease over the gears bunches and nearby parts.
Do not forget to check the gears working once you have put in the final driver. Make sure all the gears are working fine and rotating freely.
Step 6- Reassemble
Your gears are upgraded; now reassemble all the parts back in their place. First, screw the casing and then fit the gearbox in the box. Ensure it should be tight enough.
Put the protective cover back, then the tires and axle. Ensure everything is fitted correctly and there is no loose part.
Step 7- Test The Performance
Turn the power wheels car facing up, and take a drive. Drive the car back and forth and use different gears to ensure the gears are shifting correctly. If everything is okay, your car is ready for fun.
Best Power Wheel Gearbox
1. MLToys power wheels 3b gearbox Compatible with Power Wheels Vehicles
MLToys Power wheels gearbox comes in a 3B style. It is compatible with many of the power wheels models. You can easily mount it on your power wheels. The gearbox is included in the top seller list, and customers are satisfied with its performance.
The manufacturer guarantees 3 months for MLToys Power wheels gearbox. But you can enjoy it for years if you use it with care. You will need the motor separately because the motor is not included in that gearbox.
2. 12 Volt 23000RPM Gearbox for Power Wheels
It is a lightweight gearbox that is suitable for the majority of kid's power wheels cars. The drive engine comprises a high-quality plastic board and an imported motor.
You can easily identify the model number from the 12 Volt 23000RPM Gearbox motor. The customer grades it 4.5 stars and looks satisfied with its performance.
3. 24V Gearbox for Power Wheels
The power wheels gearbox is made of high-quality material. It provides a high 3000 RPM speed, making your ride faster, especially on rough roads. Mounting and replacing the gearbox is a lot simple with minimal tools.
Shifting gears is very smoother without creating noise. 24V Gearbox for Power Wheels lasts for many years without wear and tear; the manufacturer guarantees 3 months.
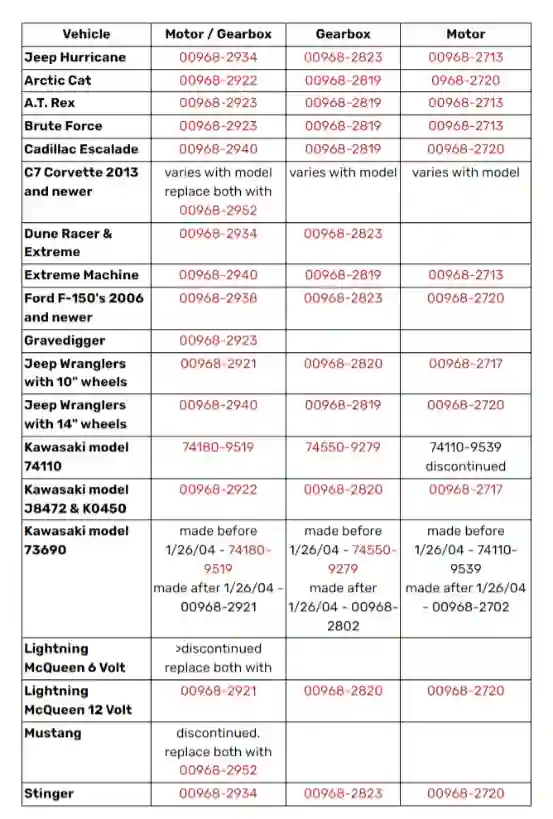
A Chart of Power Wheel Gearbox Make and Model:
Tips To Keep Power Wheels Gearbox In Good Condition
There is no exact life of a gearbox, but with some care, you can extend its life and performance.
- Servicing the gearbox is essential and improves its performance. When replacing, repairing, or upgrading the gearbox, grease all of its parts for lubrication
- Never use cheap quality parts when replacing or upgrading the gearbox
- Avoid using plastic or rubber traction; because they will melt when overheated
- Protect the gears from overvoltage because battery failure can also cause gear failure
- Avoid overloading
- Shift the gears carefully when riding off-road
Final Verdict
A faulty gearbox makes your riding experience worst. A quick repair, replacement, or upgrade can assist you in getting rid of the problem and improve overall performance. You do not need many skills and tools for repair, replacement, and upgrade.
Upgrading gears with hardened steel will make your gearbox long-lasting and best performing. The process is straightforward and does not take more than 30 minutes to complete once you have read the guide carefully.
Last but not least, when you have accomplished the total process, take your power wheel ride on a toy car for a test drive. If the power wheel gearbox is a new part, then look for a little hardness in the replacement at first. Ensure that you simply drive in a little way which saves you from any problem with the gearbox that causes an accident.
