If you want to make your kid’s ride on tcar look unique and stylish, then lowering the power wheels can be a great idea. But it's not an easy task to lower a power wheel. However, it doesn't mean that it's impossible.
You need to remove the wheels and the shaft. Then make the shaft holes bigger and put some square tubes following the right measurements. Finally, reinstall the wheels, and you will notice the power wheel is lower than earlier.
It might sound like a complicated job lowering a power wheel. But you can do it with proper guidance. Stay tuned with me till the end to get a step-by-step guideline on how to lower a power wheels car.
Know this Before Lowering Your Power Wheels
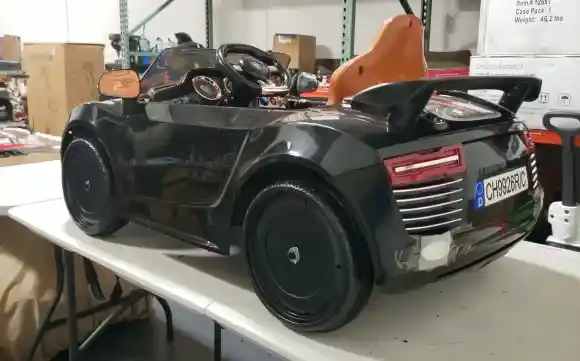
If you decide to lower your power wheel, you must ensure that it is already not too low. If there is enough gap, usually more than 2.5 inches, between the wheelbase and the ground, you may lower it slightly.
Besides, try to work in a spacious area as you will have to disassemble a lot of parts. We prefer working in a garage or in the backyard.
Step-by-step Guide to lowering your power wheels
Now let’s get into the technicality of the process. We will break down the entire process of lowering your power wheels step by step. So without further delay, let’s get cracking:
Equipment you need
First and foremost, the important thing is to have the right tools and parts. We’ve made things easy for you. Here is a list of everything that you will need to get your power wheels lowered:
- Protective gear
- Flathead screwdrivers
- Drill
- Hacksaw/ hand grinder
- Wrenches
- ¾ X ¾ aluminum square tubing
- ¼ X 4 inches. long screws (4 pieces with nuts and ½ inch. washers)
- 3 X 3 aluminum L- bracket
- Six ½ inches. screws
Step-by-step process
Once you have all the materials at hand, you’re good to start lowering the power wheel vehicle. So let’s walk through the process together:
Step 1: Remove the Windshield
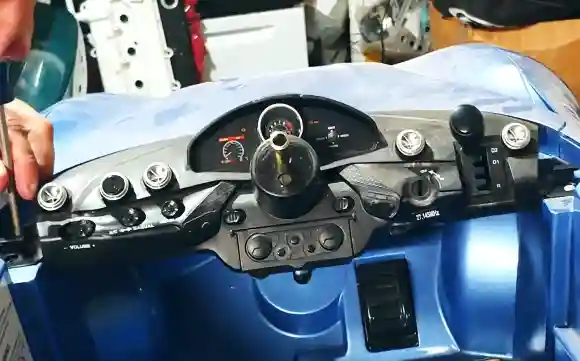
Firstly, prepare your vehicle for the modification you are about to do.
Remove the screw(s) on the steering wheel using a screwdriver because you will be modifying the steering shaft area.
Now take out the seat and windshield. When removing the windshield, you’ll need to unscrew it from the dashboard. This will be most useful if you will flip the power wheel to work on the base.
Step 2: Take Measurements
The next step is to flip the power wheels car upside down. The base of the vehicle and its tire should be plastic built with a metal frame at the front that nestles the steering shaft.
Take proper and accurate measurements of the space between the tires and the car’s body. Then you will be able to determine how much you can lower the toy car so that it is safely driveable.
Step 3: Remove Wheels
Now you will start removing the wheels. You can do this quite swiftly using your screwdrivers. Some models might require a needle nose, but the idea is the same. Remove all the screws, and the tires will be easy to take out.
Step 4: Take Off the Metal Frame
Remember we talked about the metal frame that holds the steering shaft? Once the tires are removed, you need to remove the metal frame. Carefully mark up the nuts and bolts that connect the metal frame to the plastic body of the car. Be cautious to not unscrew any other bolts and only remove the necessary ones.
Then make the holes bigger to fit a ¼ inches screw. Also, remove the parts that are handling the steering shaft. You will need two clips and a washer that is holding this component. Then flip the part and reinstall it with those clips and washers.
Step 5: Reinstall the Wheels
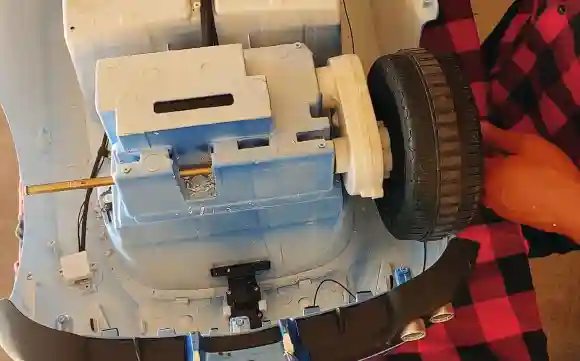
Now, cut the square tubes and prepare four 2.25-inch pieces. It will lower the power wheels by around 1.25 inches. However, I recommend you test with one piece first. You can always resize the square tubes if it lowers your toy car too much or not much.
Next, put the square tubes into the holes you made bigger in the previous step. It will lift the frame to lower the power wheel. Make sure that the wheels do not touch the body.
Ensure you have installed the shaft in the frame. Install both wheels, and you will notice that the power wheel is lowered in the front.
Step 6: Modify the Back
After finishing working with the wheels, you need to work on the back. Take similar measurements to the front and remove the wheels and the gearbox. Then remove the shaft and make bigger holes as you did in the front.
While making holes in the back, use a drill machine. That is because you need to make four wheels both outside and inside, to ensure the shaft goes through them. The holes need not be perfect. If the shaft goes through them, it’s enough.
Tip: You can use L-brackets for extra stability to the wheels. Remove everything from the upper side of the rear wheels and put the L-brackets there.
Once you are done making holes and putting in L-brackets, reinstall the wheels. Now you will notice the back is also lowered.
Step 7: Reassemble the Parts
In the last step, reinstall everything else that remains. The motor, the gearbox, reinstall everything, and the work is done.
Now, test the power wheels to see if it is running fine. If your kid feels uncomfortable, you can always follow the same process to rectify the gap. Remember to use different size square tubes if you are remodifying.
How much will it cost to lower power wheels yourself?
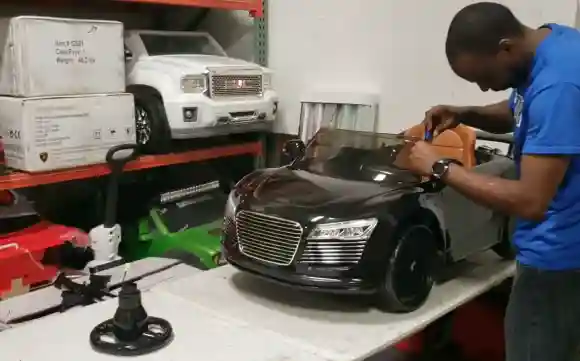
Lowering the power wheels yourself will cost around $10 to $20. You do not need to buy many things except a few square tubes, L-brackets, and screws.
However, if you do not have the necessary tools, such as a wrench, drill machine, or screwdriver, then you may also need to invest in them. It will increase the cost of lowering the power wheels.
Price of lowered power wheels in the market
The price of lowered power wheels can vary between $150 to $500 in the market. It mainly depends on which toy car model you are buying.
However, the cost can be much lower if you are buying used power wheels. You may get a good deal within a hundred dollars.
Pros and cons of lowering power wheels
Lowering a power wheel has a lot of benefits as well as some disadvantages. Let’s have a look at the pros and cons of lowering power wheels.
Pros:
- A lowered power wheel remains close to the ground and has less chance of cornering or accidents in turns.
- Shorter kids will find it easy to get in the toy car.
- It gives a unique and cooler look.
- It improves the traction of the vehicle.
Cons:
- The rider may feel uncomfortable driving on rough terrains.
- The potential risk of bottoming out.
FAQs:
1. How to slow down power wheels?
You can turn down the voltage of your power wheels to make them slower. Twist the knob in the speed controller, and it will do the job. Besides, you also can use a lower voltage battery.
2. Do smaller wheels make your car lower?
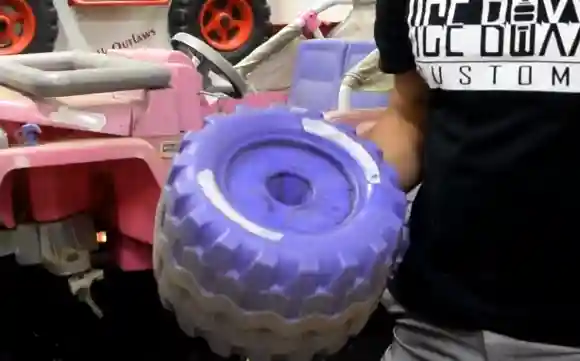
Yes. Smaller wheels will make your car lower. But you may face problems with them if you need to drive on rough terrains. They are excellent for flat tracks, though.
3. How to remove over tightened wheel bolts?
You can use a breaker bar or an impact wrench to put extra pressure to remove over-tightened wheel bolts. You also can hammer a socket over it as an easy alternative.
4. How do Power Adjust Wheels Work?
Adjusted power wheels give a smoother riding experience if done right. Besides, you must ensure you keep the rims free of rust to enjoy maximum benefits.
5. Where to get power wheels fixed?
You can visit any nearby automotive service center to get your power wheels fixed. However, if you still have a warranty left, you can visit the dealer or company’s service center to get free repair service.
6. Why is my power wheels so slow?
The most common reason for a slow power wheel is the battery. Either the battery is low, or battery is damaged. First, try to charge the battery fully and see if the speed improves. If not, changing the battery will fix the issue.
Our thoughts
I have explained how you can lower your power wheels by following the above mentioned step-by-step guidelines.
However, if you are still not sure whether to lower the power wheels or not, we say go for it. It improves the style and safety.
But if your kid rides on an uneven track, then it is better to not lower the power wheels.
